If you’ve been thinking about becoming more self-reliant but don’t know where to begin, you’re in the right place. This comprehensive guide will show you how to start prepping in the UK step by step, even if you’re on a tight budget and have zero experience.
Prepping isn’t about fear. It’s about resilience, independence, and peace of mind—whether you’re preparing for natural disasters, economic instability, power outages, or personal emergencies.
What Is Prepping?
Prepping (short for preparedness) is the practice of preparing for emergencies before they happen. This can include:
- Natural disasters (storms, flooding, wildfires)
- Power grid failures.
- Supply chain disruptions.
- Job loss or financial hardship.
- Civil unrest.
- Personal emergencies.
Why You Should Start Prepping Today
You don’t need to believe the world is ending to see the value in being prepared.
Events such as:
- Global pandemics.
- Storms.
- Power outages.
- Flooding.
These have all shown how quickly everyday life can be disrupted. You may not have control over what happens, but being prepared gives you control over your environment.
Prepping helps you:
- Reduce panic during emergencies.
- Protect your family in times of crisis.
- Save money long-term.
- Build self-reliance and skills.
- Increase confidence.
Step 1: Start With a Risk Assessment
Before buying anything, assess your realistic risks.
Ask yourself:
- Is your area prone to winter storms, flooding or power outages?
- How stable is your local infrastructure?
- Do you have enough savings to cover three to six months of expenses?
Focus on Likely Scenarios First
Prepping is about focusing on likely risks, not worrying about unlikely ones.
Step 2: Build a 72-Hour Emergency Kit
Emergency management agencies recommend being self-sufficient for at least 72 hours.
Your basic kit should include:
Water
- 1 gallon per person per day.
- Minimum 3-day supply.
- Water purification tablets or filters.
Food
- Non-perishable items.
- Canned goods.
- Rice and beans.
- Protein bars.
- Freeze-dried meals.
Lighting & Power
- Flashlights.
- Extra batteries.
- Battery bank.
Medical
- First aid kit.
- Prescription medications.
- Pain relief.
- Hygiene supplies.
Documents
- Copies of IDs.
- Insurance paperwork.
- Emergency contacts.
- Cash.
Begin with a few items and add one or two more each week.
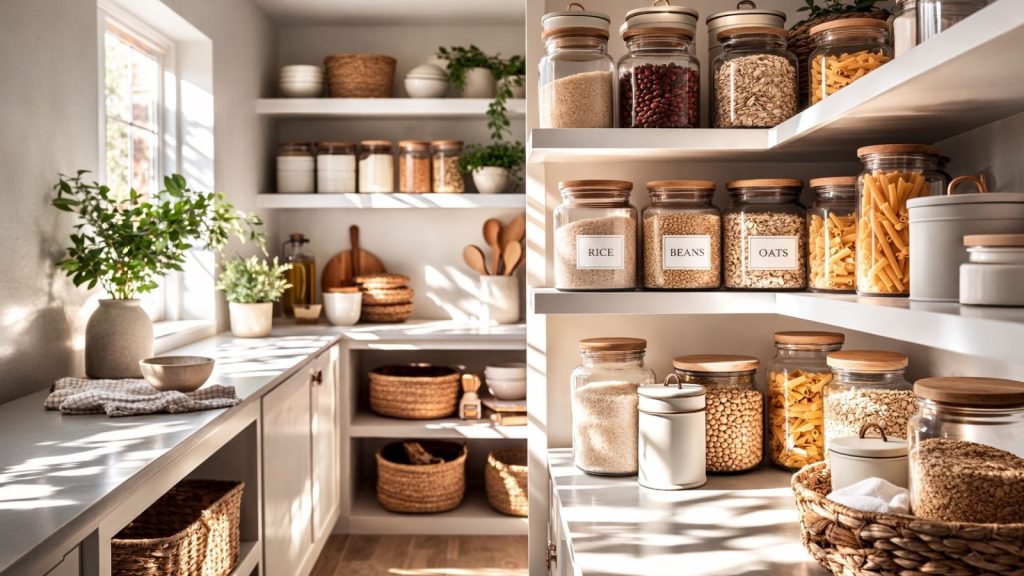
Step 3: Stock a 2–4 Week Food Supply
Once your 72-hour kit is complete, expand into short-term food storage.
Beginner Food Storage Staples
- Rice
- Beans
- Pasta
- Oats
- Flour
- Sugar
- Salt
- Canned vegetables
- Canned meat
- Peanut butter
Choose foods you already enjoy eating to make sure you are not overspending, and nothing will go to waste in the long run.
A practical system many preppers use is:
“Store what you eat. Eat what you store.”
Rotate items every 6–12 months.
Step 4: Secure a Reliable Water Plan
Water is more important than food.
Consider:
- Water storage barres.
- Gravity-fed water filters.
- Rain collection systems (where legal).
- Nearby natural water sources.
Even a simple gravity filter can greatly increase your preparedness.
Step 5: Strengthen Home Preparedness
Beyond supplies, consider your home’s infrastructure and how it can be improved.
Power
- Generator (gas or solar).
- Backup batteries.
- Surge protection.
Security
- Reinforced doors.
- Exterior lighting.
- Alarm systems.
- Community awareness.
Heating & Cooling
- Backup heat source.
- Proper insulation.
- Emergency blankets.
Being prepared makes your home stronger and safer during any crisis.
Step 6: Learn Survival Skills
Gear is helpful, but skills are more powerful.
Focus on:
- Basic first aid.
- CPR.
- Fire starting.
- Cooking without electricity.
- Gardening.
- Food preservation.
- Situational awareness.
Step 7: Build Financial Preparedness
Many emergencies are financial, not apocalyptic.
Start with:
- £1,000 emergency fund.
- 3–6 months of expenses saved.
- Reduced debt.
- Backup income skills.
Many people overlook financial resilience, but it’s a key part of prepping. Saving a little each month towards your fund will be worth it in the long term.
Step 8: Create an Emergency Plan
Having a plan if there are any emergencies is always a good thing, it doesn’t need to be anything over the top.
Your plan should include:
- Family communication strategy for if anything was to happen and you need to contact each other.
- A meeting location.
Step 9: Join a Preparedness Community
A community helping each other is very valuable during a crisis.
Look for:
- Local gardening groups.
- Community emergency response teams.
- Online preparedness forums.
Being part of a community makes you more resilient and connects you to like-minded individuals.
Step 10: Avoid Common Beginner Mistakes
Many beginners:
- Overspend on tactical gear.
- Ignore financial preparedness.
- Hoard food they never eat.
- Skip skill-building.
- Focus on unlikely doomsday scenarios.
Keep your approach practical and balanced. Preparedness should be affordable and improve your life, not consume it.
How Much Does It Cost to Start Prepping?
You can start prepping for under £50.
Begin with:
- Extra bottles of water.
- A bag of rice and beans.
- A flashlight.
- A basic first aid kit.
Preparedness is built over time; it won’t happen overnight. The key is to be consistent; doing it all at once matters much less.
Frequently Asked Questions
Is prepping extreme?
No. Emergency preparedness is recommended by governments and public health officials.
How much food should I store?
Start with 3 days. Build to 2–4 weeks. Long-term storage can come later.
What’s the most important prep?
Water, medical supplies, and financial savings.
Final Thoughts:
Prepping is about making sure you’re ready if or when disruptions occur, whether it’s a storm, a blackout, or economic hardship.
Start small and stay consistent. Focus on realistic threats. Build skills alongside supplies.
The second-best time is today.